With winter upon us, it's all about the ice now and I've put down a few thoughts on placing ice screws, along with some other important considerations
Firstly, be aware that as with many rock routes, good protection can be difficult to find and placements aren’t always reliable and possibly spaced out. This is true on many steep ice routes where the formed ice or nature of the route make placing a good ice screw difficult or even impossible.
So with any real adventure there will always be an elemnt of risk, but hopefully some of my thoughts below will cover a few important points to remember when out on the ice.

Longer screws generally help in these difficult conditions where the ice is aerated, cauliflowery, chanderliery or has formed in steep columns, which have then been welded together. This is because they go in deeper and over the length of the screw there may be enough ice around it giving the strength to hold a fall.
Longer screws also help in easier angled slushy or sun bleached snow.
I also try to use a longer screw to make up the two screws that I use to build a solid anchor for a belay.
Long screws are also best when building an Abolochov or ‘V’ thread anchor so the bottom of the ‘V’ is as deep in the ice as you can get it.

Medium length screws are marginally less reliable in these types of conditions and it’s only the short ‘stubbies’ where you see a marked difference in pull strength but even then that may not be true!
All the BD express stainless steel screws I use, whether it’s a long or stubby, all have the same length of thread and it’s just the shaft length that changes, meaning that you are able to place them deeper.
It’s not always the longer screws that give the most security.
Example - A long screw placed up to the hanger may have started off in good ice but part way through screwing it in you’ve hit an air pocket or a hollow, the thread is now not into anything.
The highest pull strength of a screw is straight out, pulling against the screw threads in good ice.
So if the thread is in a hollow or air pocket the screw is likely to pull during a fall. In this example a shorter screw or stubby would be best, where the thread of the screw bites into the better solid outer ice.

A great indicator to the quality of the ice is what comes out of the screws tube when you place it. If it dribbles out over the top in granular dry ice then the structure of the ice is very weak and brittle. Conversely if it comes out in a solid bar with very little air then the ice is very solid and structurally sound.
Place the screws at ninety degrees to the ice and try to get them in up to the hanger. If you can’t then try to replace the screw in thicker ice or use a shorter screw. Sometimes you’ll need to clean the surface of the ice with your adze to turn the hanger and get it flush with the ice. If you don’t have a choice and no shorter screw... then with a thin 4ft sling, loop a clove-hitch over the hanger and tighten around the tube of the screw and push it flush with the ice and then clip to this. Don’t clip directly to the hanger unless it’s only a centimetre proud of the ice and in which case you don’t need to tie off a sling to it.

Old screw placements can be some of your best placements, but only in certain conditions. If a screw was placed the day before by a climber and during that day the ice has been in the sun & melted a little, this will have melted out any cracks or weaknesses of the placement. An overnight freeze will have welded the cracks together and iced over the surface. The following day as you place your screw in the old narrower hole you create your own thread but into a much more solid tube giving a quick and solid placement.
Also place as many screws as you feel comfortable with not as many as you think you should, just leave a couple of belay screws on the back of your harness for the belay so you don’t use them.

.
Always, always carry an Abolochov or ‘V’ threader, for if you need to abseil off a route eg the ice has formed thick this year & the bolts are hidden under a foot of ice so you need to abseil without leaving a screw behind, or half way up a route and you need to bail out then you could drill in a screw and thread a pillar or something, or the bolts have been flattened by rock fall or the route doesn’t have a bolt descent.
Carry your screws on a ‘Simond Rack’ or something similar & have one on each side. This means they’re easy to get on & off with one hand and always available whether it’s a left or right-hand placement, depending on where the better ice is.

Look after the screws, always keep them capped when you’re carrying them anywhere which will keep the cutting teeth & points sharp. Take off the caps at the end of the day and dry the screws out well. I don’t bother with caps which I loose anyway and now have a sleeved roll up bag that I keep the screws in. At the bottom of the sleeve is a hole to drain out any moisture and it also keeps the threads sharp.
Buy two of these with six sleeves in each so your twelve screws can be split evenly between you and your partner.

Look also for softer less brittle ice.
I climbed a route last winter when during the day, temperatures where high, it was literally hot and sunny, but overnight the temperatures plummeted to -12degress.
We walked in and the icefall looked great. The ice was well formed and had been climbing recently – a good track in the snow up to the base of it.
We kitted up and I set off climbing up the first pitch.
As I started up the route the temp was very cold as was the ice, the ice was also very brittle and I heard big cracking sounds around where I was placing my tools. I saw some horizontal large cracks in the ice & I wasn’t happy, so I down climbed and we headed back down the hill.
We went for a coffee in the village.

We headed back up to the route around lunchtime, when it was just starting to come into the sun.
I set off and it felt like a different climb, the sun had immediately transformed the ice as it was so hot, relaxed the ice and made it safe to climb again. You could feel there was less tension in the ice and it was a joy to climb and now perfect conditions with first time placements.
I still kept all my ice screws out of the brittle ice in the shade and placed them in more relaxed ice just getting the sun, they all felt solid.
In the bar if you’d have asked me what we climbed today I’ve had told them the climb and what a great route it was and that it was in fantastic condition. I would have also told them that we waited till mid-day till it was in the sun.
You may not always get the full story and just the best bits such as ‘it was in great shape and get yourselves on it’.
Ice is changing all the time and you need to follow your own instincts and treat each day as a new day and with a blank sheet with no baggage, what was last night’s temps, what’s last week’s temps, what’s the snow doing, when did it last snow...... paint a new picture every day.
The hardest thing sometimes is not to climb the route but to turn around and do it another day.

Another thought should go to the snowpack & what effects that has on the icefall. Is there a steep bowl(feed) above the icefall which is heavily loaded with unstable snow, out of sight & in the full sun while you’re at the base of the icefall in the shade? Also give thought to the wind and the effects of strong winds cross loading powder snow and depositing them into gullies above & feeding the gulley you’re climbing in. Also the wind depositing snow and creating wind slabs in bowls above or the bowl you need to cross to get to the next pitch. Also wind slab on the slopes leading up to and off from the route you’re climbing.
Try not to climb under other teams as you’ll more than likely get hit by falling ice – get to the climbs early & get down early unless it’s during a very cold period and you want to climb later in the day.
If you do climb under other teams then take extra care, let them get a pitch ahead. Don’t think that they’re two pitches up and that’s ok because in dry conditions with little snow around the ice bounces all the way down to the bottom. Safer conditions is when there is a lot of snow around, ice knocked off by a leader a pitch or two up may be caught by the deep snow lying around.

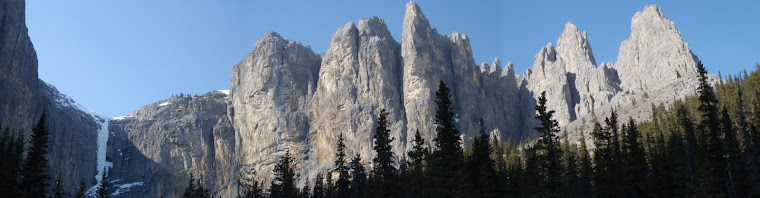
Kandersteg in all it's glory
The icefalls in the Alps are world class & with the luxury of thousands of routes all being in a relatively small compact area, you have choices and short walk in’s, you can climb on different aspects & at different altitudes each day or in a single day if you need to. And everyday day is an adventure.
Take care & enjoy – I love it!
Ade
No comments:
Post a Comment